Build your first agent
Walks you through creating, testing and publishing your first agent.
Ready to create your first AI agent?
This guide will walk you through the process of creating, configuring, testing and publishing an agent in Askollo. By the end, you'll have a working agent that you can start using and improving.
Estimated time: 10-15 minutes
What you'll learn
By the end of this guide you'll know how to:
Create a new agent
Define what your agent should do
Give your agent clear instructions
Connect relevant knowledge
Test your agent
Refine its responses
Publish and share your agent
Before you begin
For your first agent, we recommend starting with something straightforward rather than trying to automate a complex process.
For example, an HR Policy Assistant: an agent that helps employees find answers to common questions about company policies.
Step 1: Create a new agent
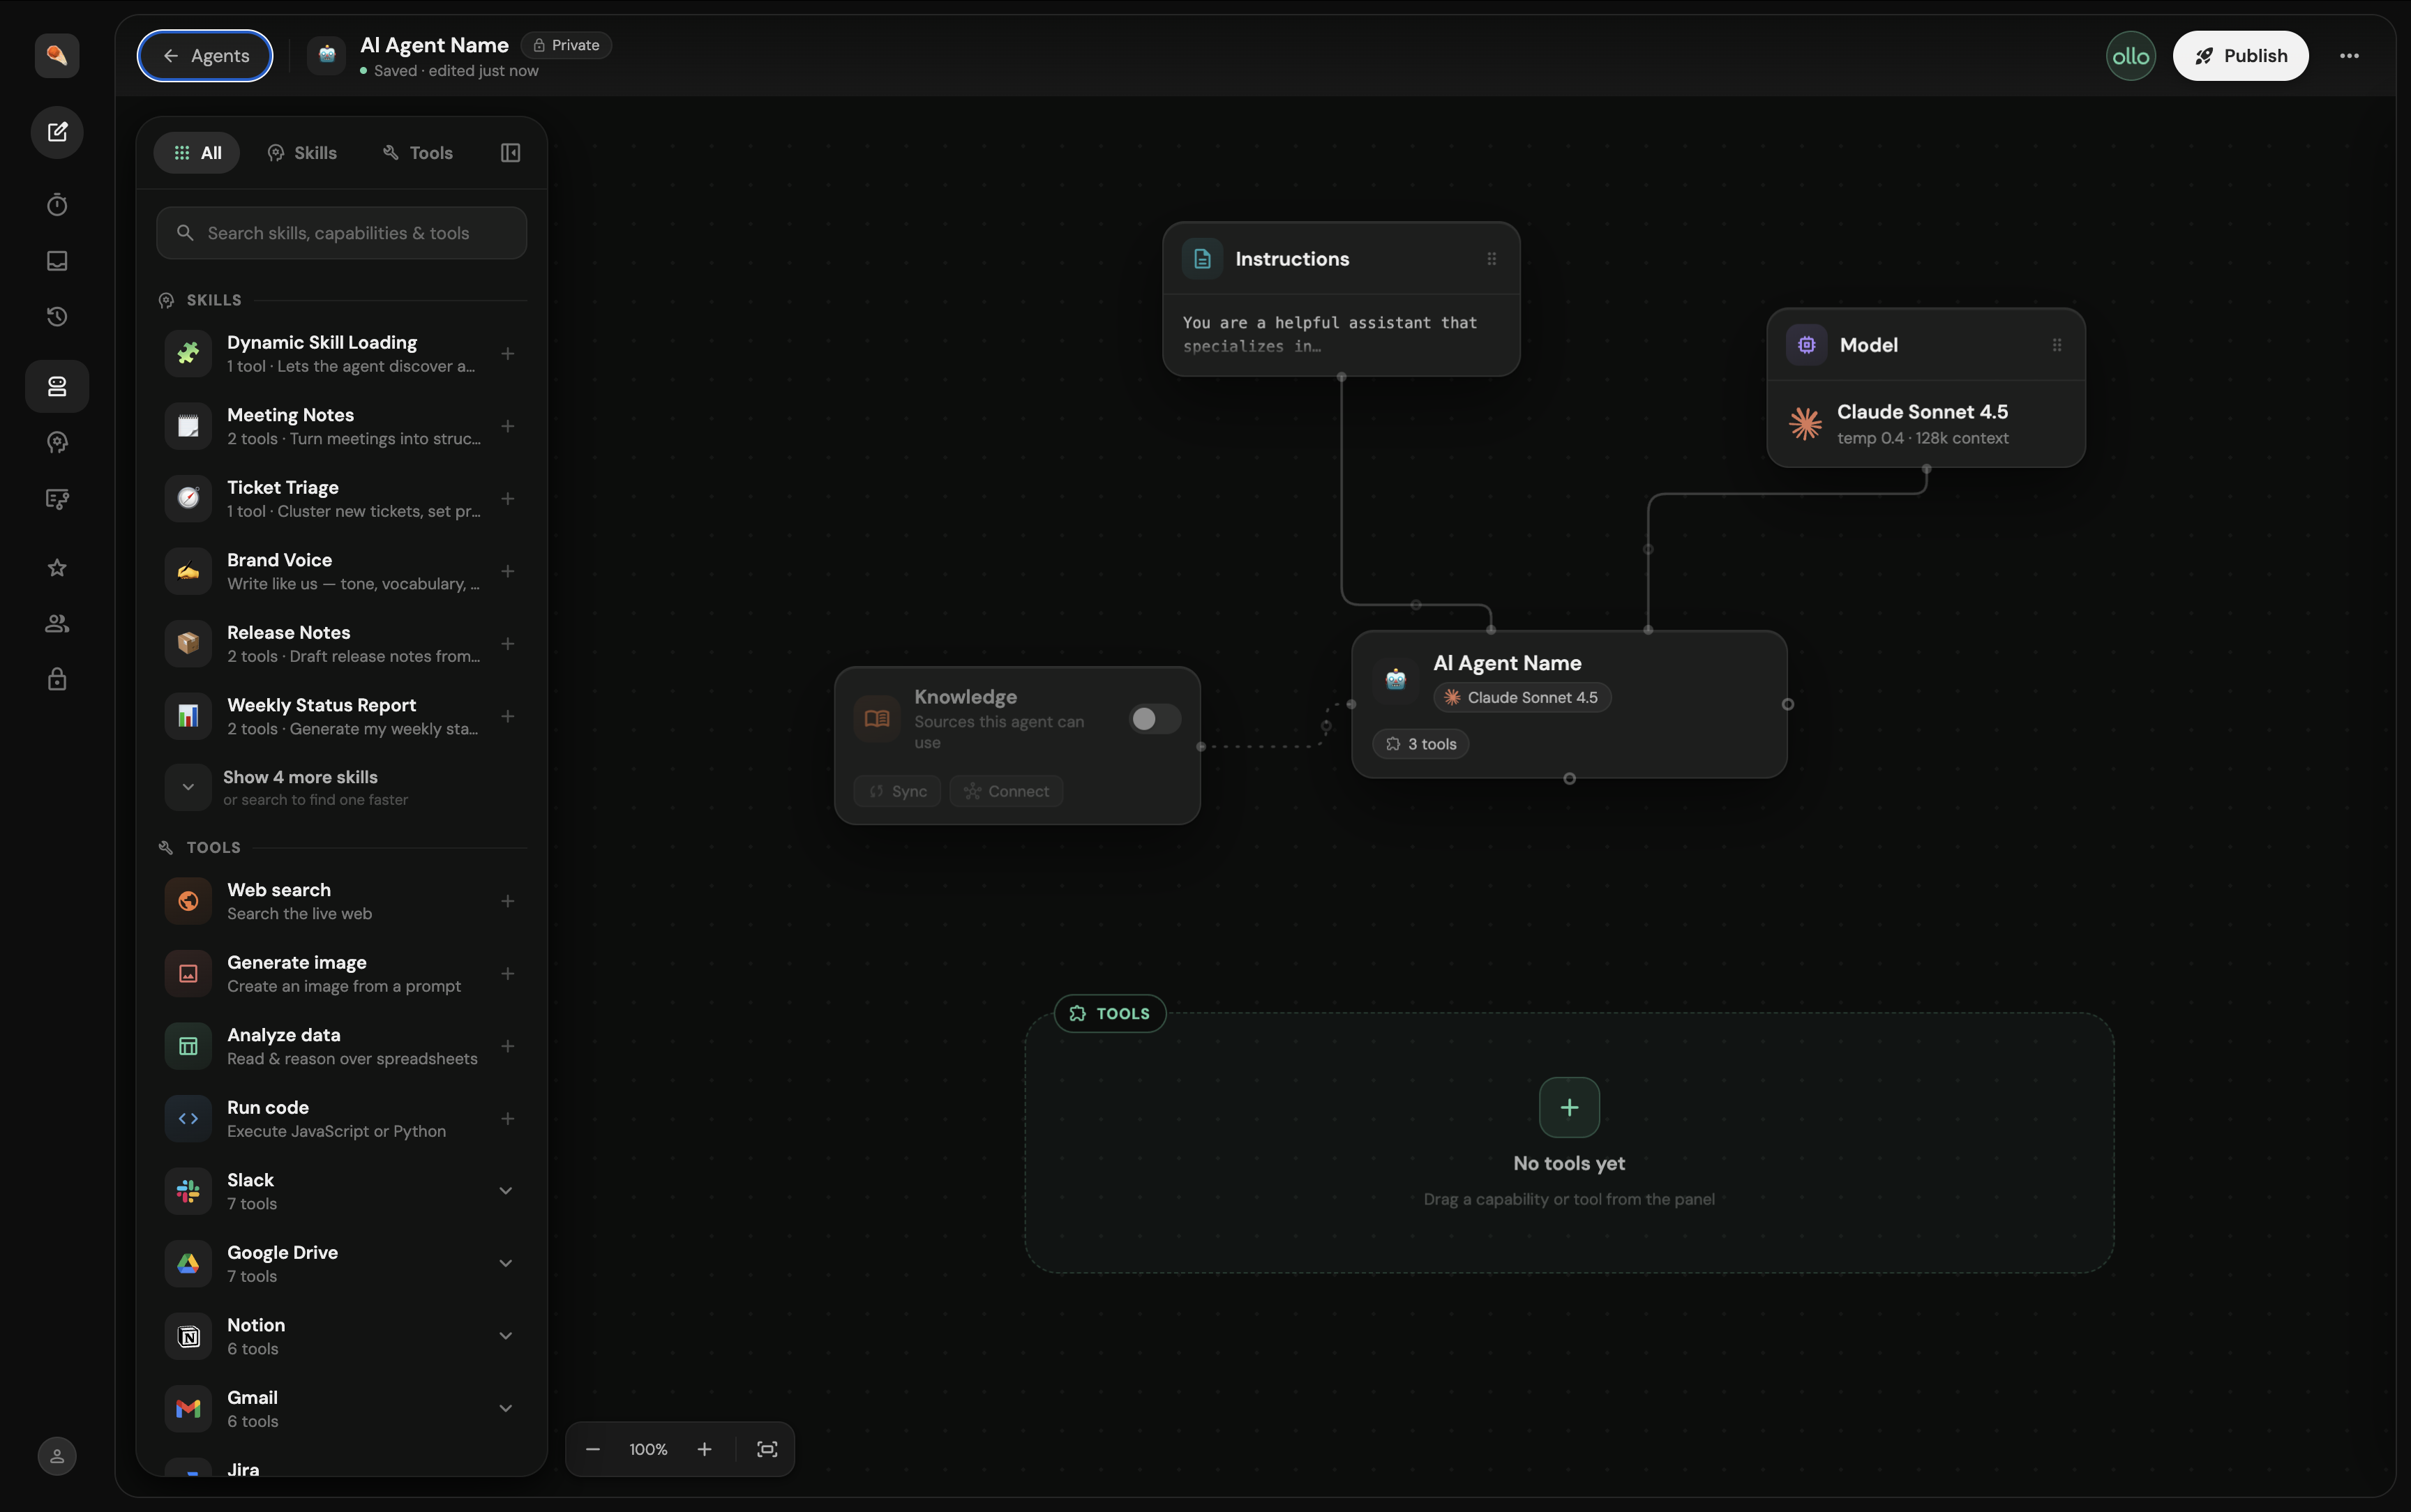
Open Agent Builder and select Create agent. You'll be taken to the agent creation flow, where you can start configuring your agent.
Step 2: Give your agent a name
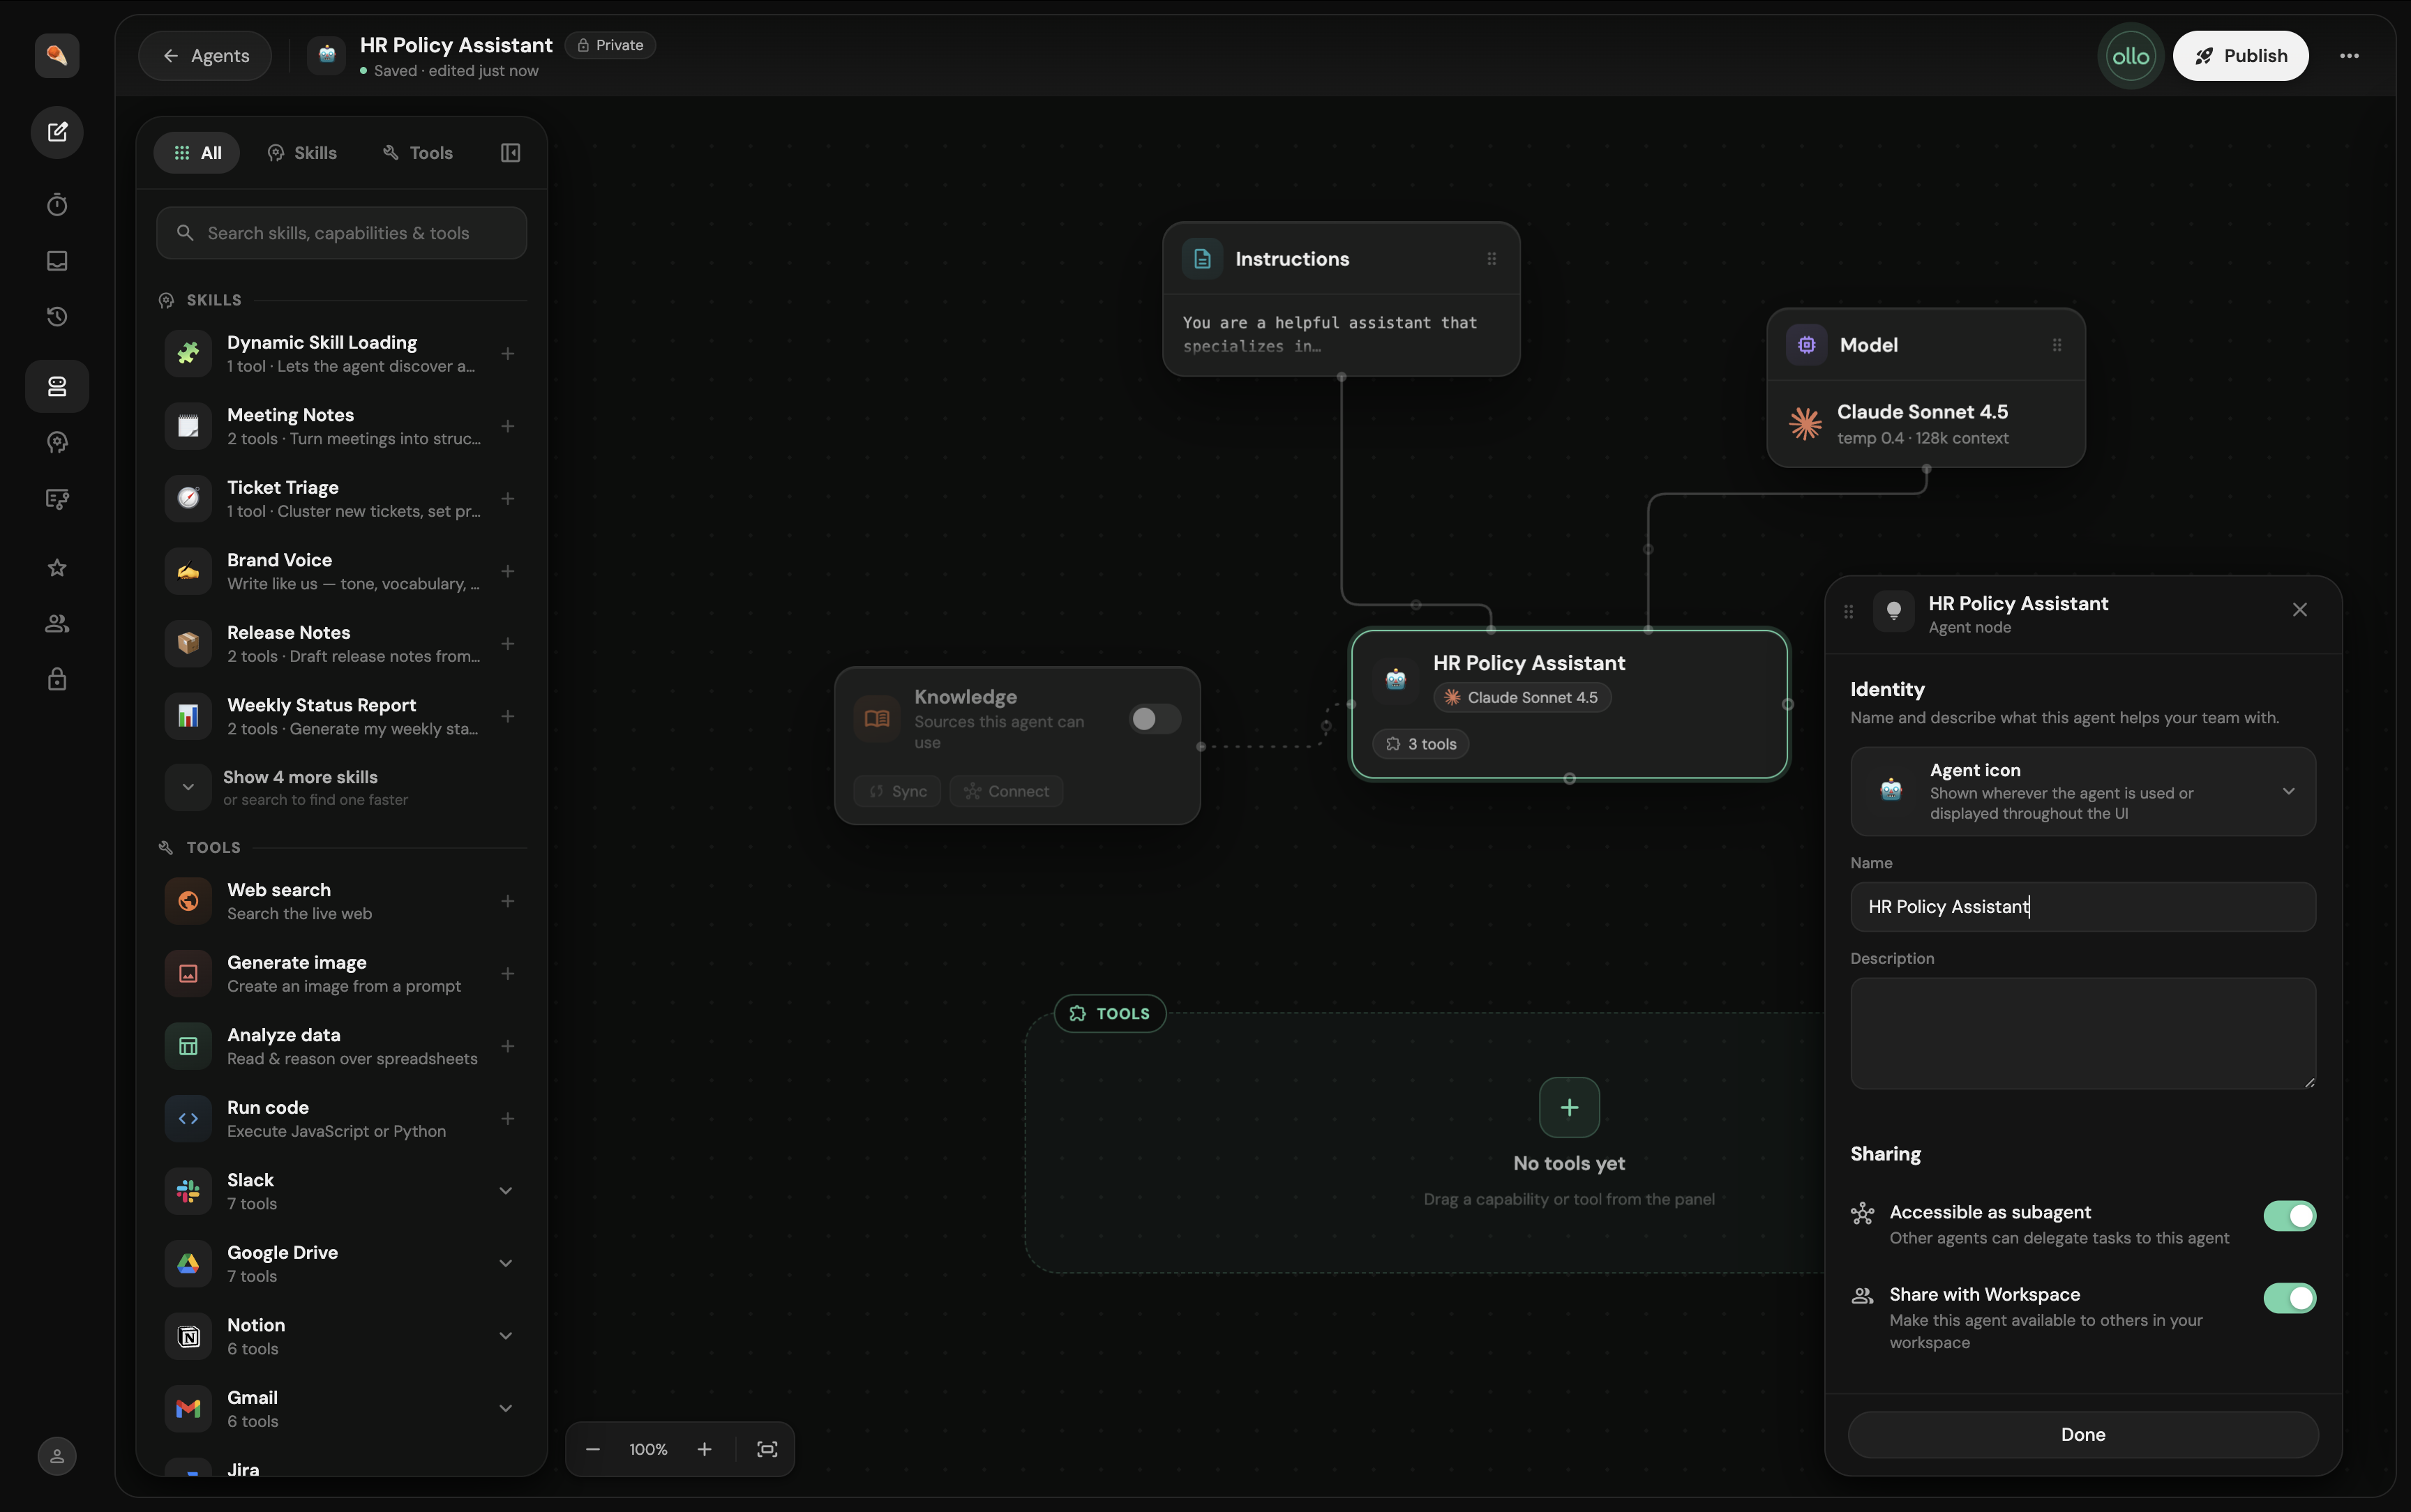
Choose a clear name that tells users what your agent is designed to do. For example:
HR Policy Assistant
Sales Enablement Assistant
IT Support Agent
Customer Support Assistant
For this guide, we'll create an HR Policy Assistant.
Step 3: Define your agent's purpose
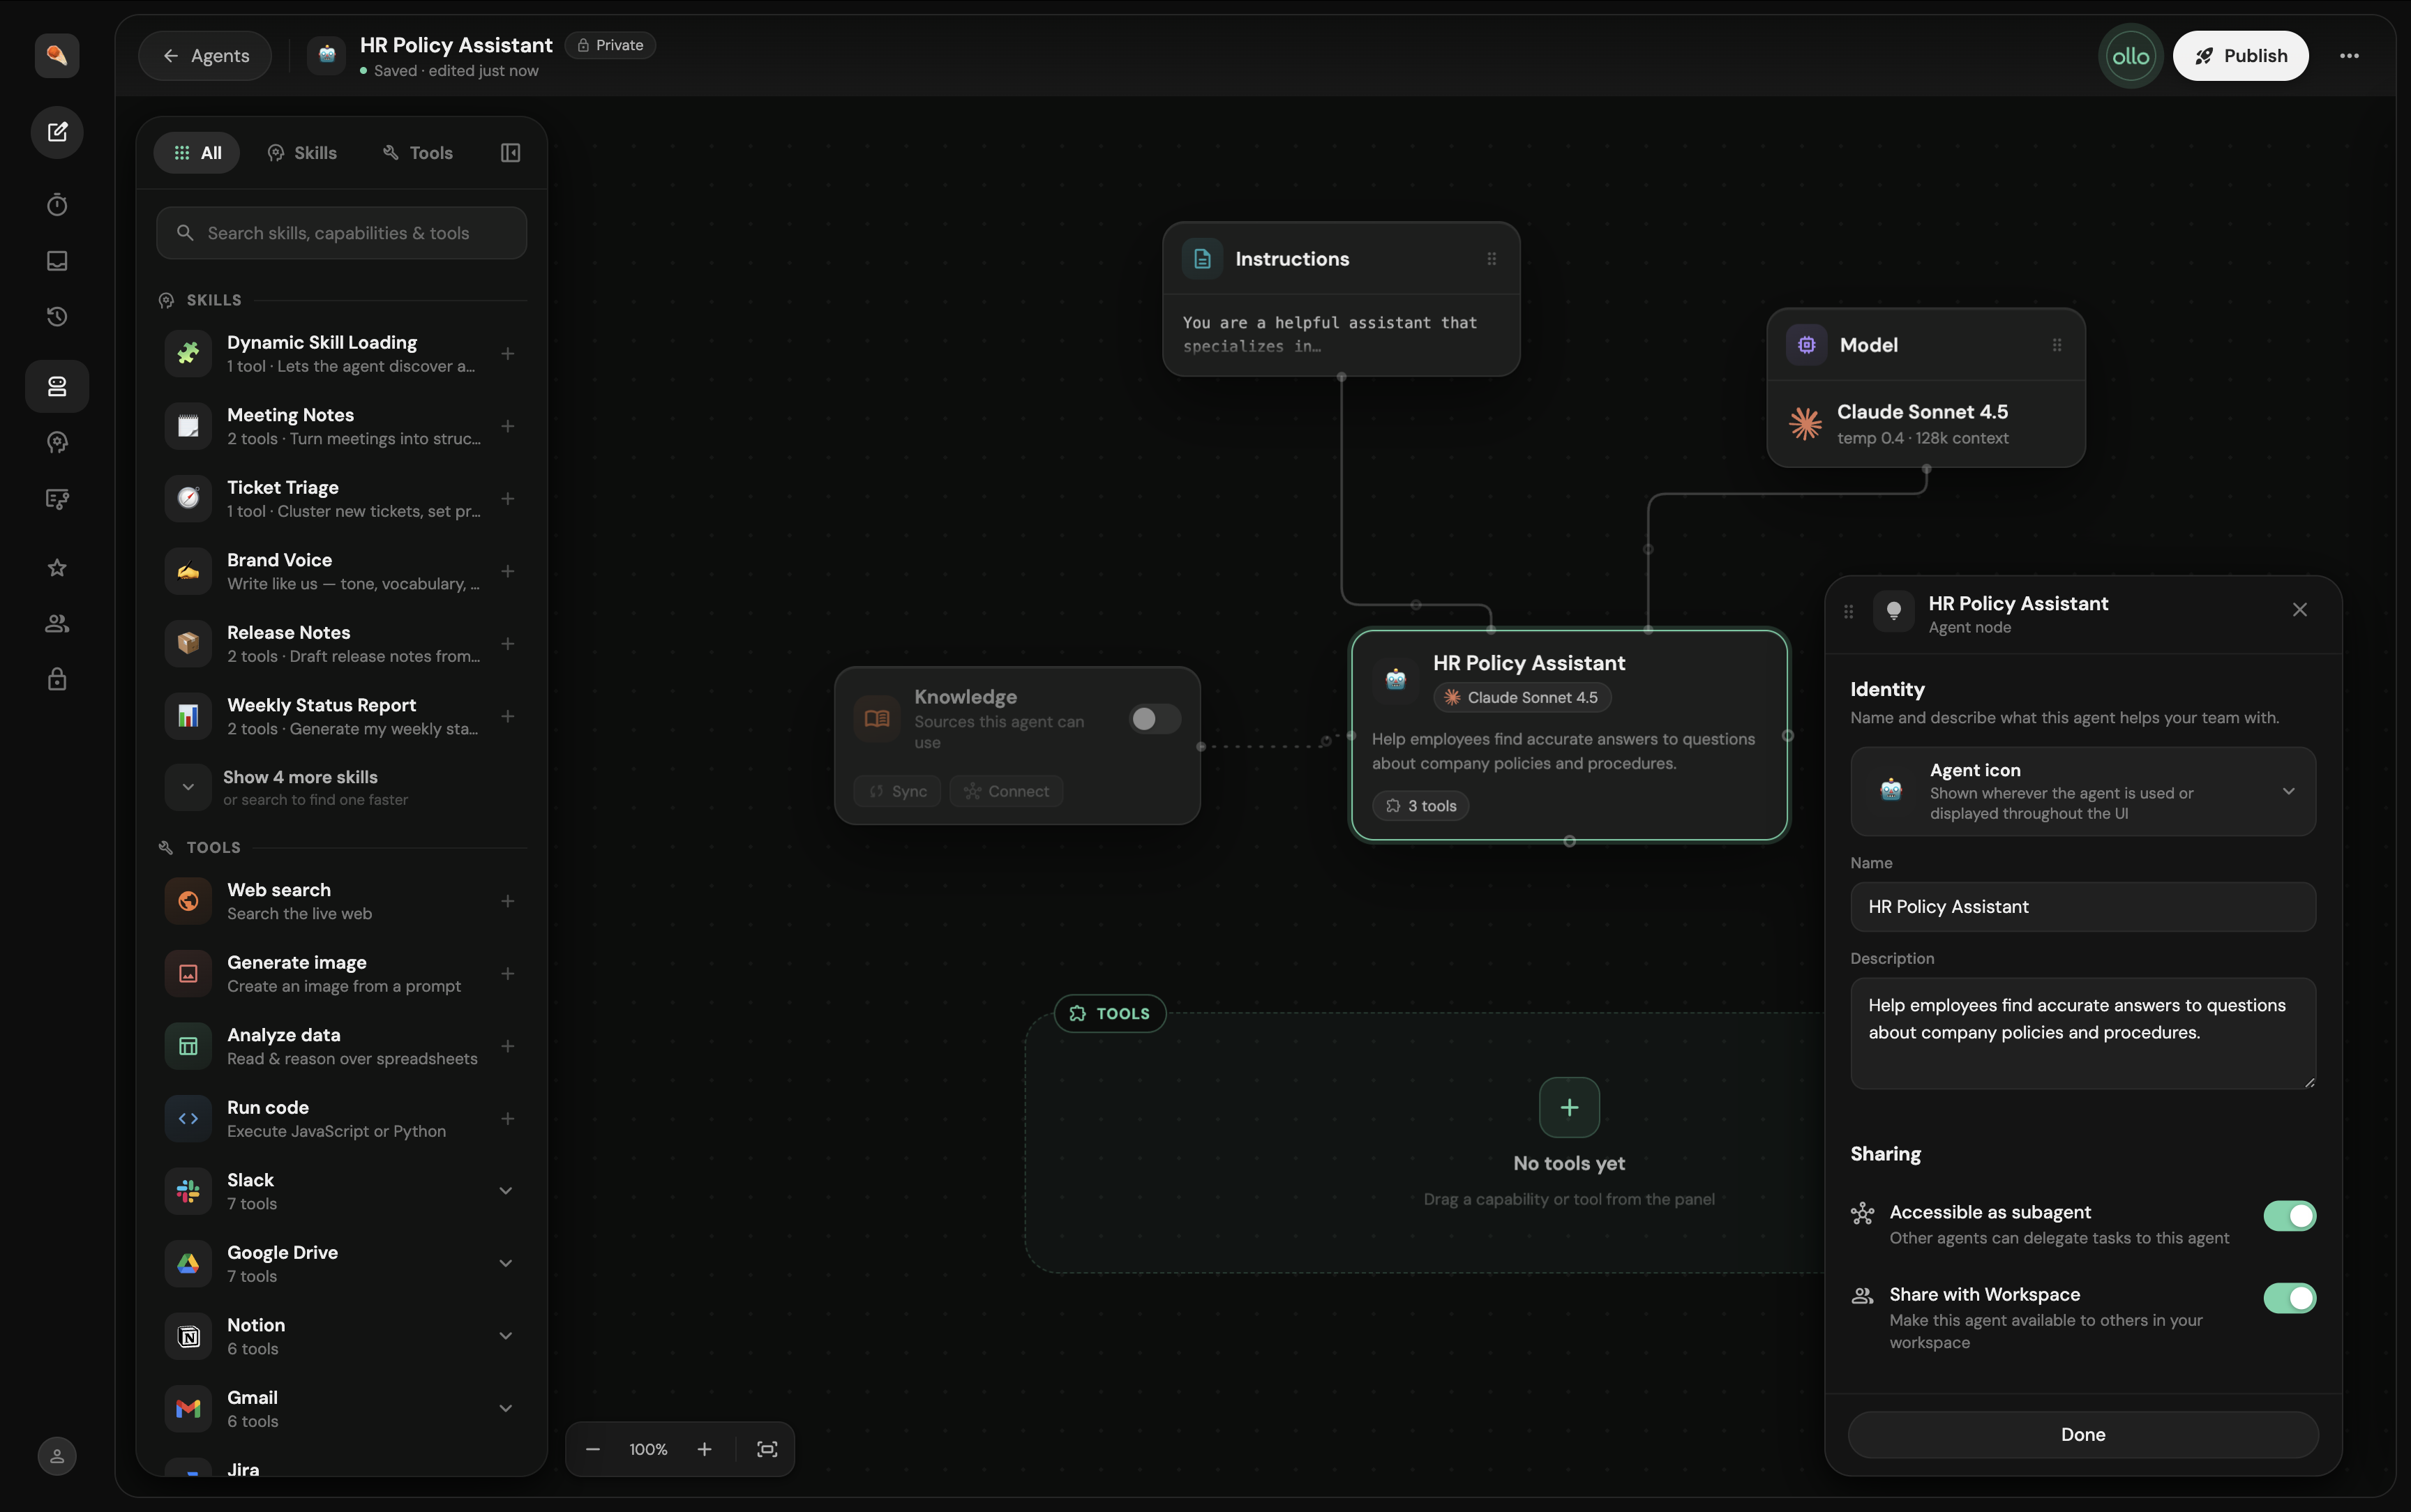
Next, decide what you want your agent to do. Try to give your agent one clear purpose rather than asking it to do everything.
For our HR Policy Assistant, that might be: help employees find accurate answers to questions about company policies and procedures.
A clear purpose makes it easier to decide what knowledge and instructions your agent needs.
Step 4: Add instructions
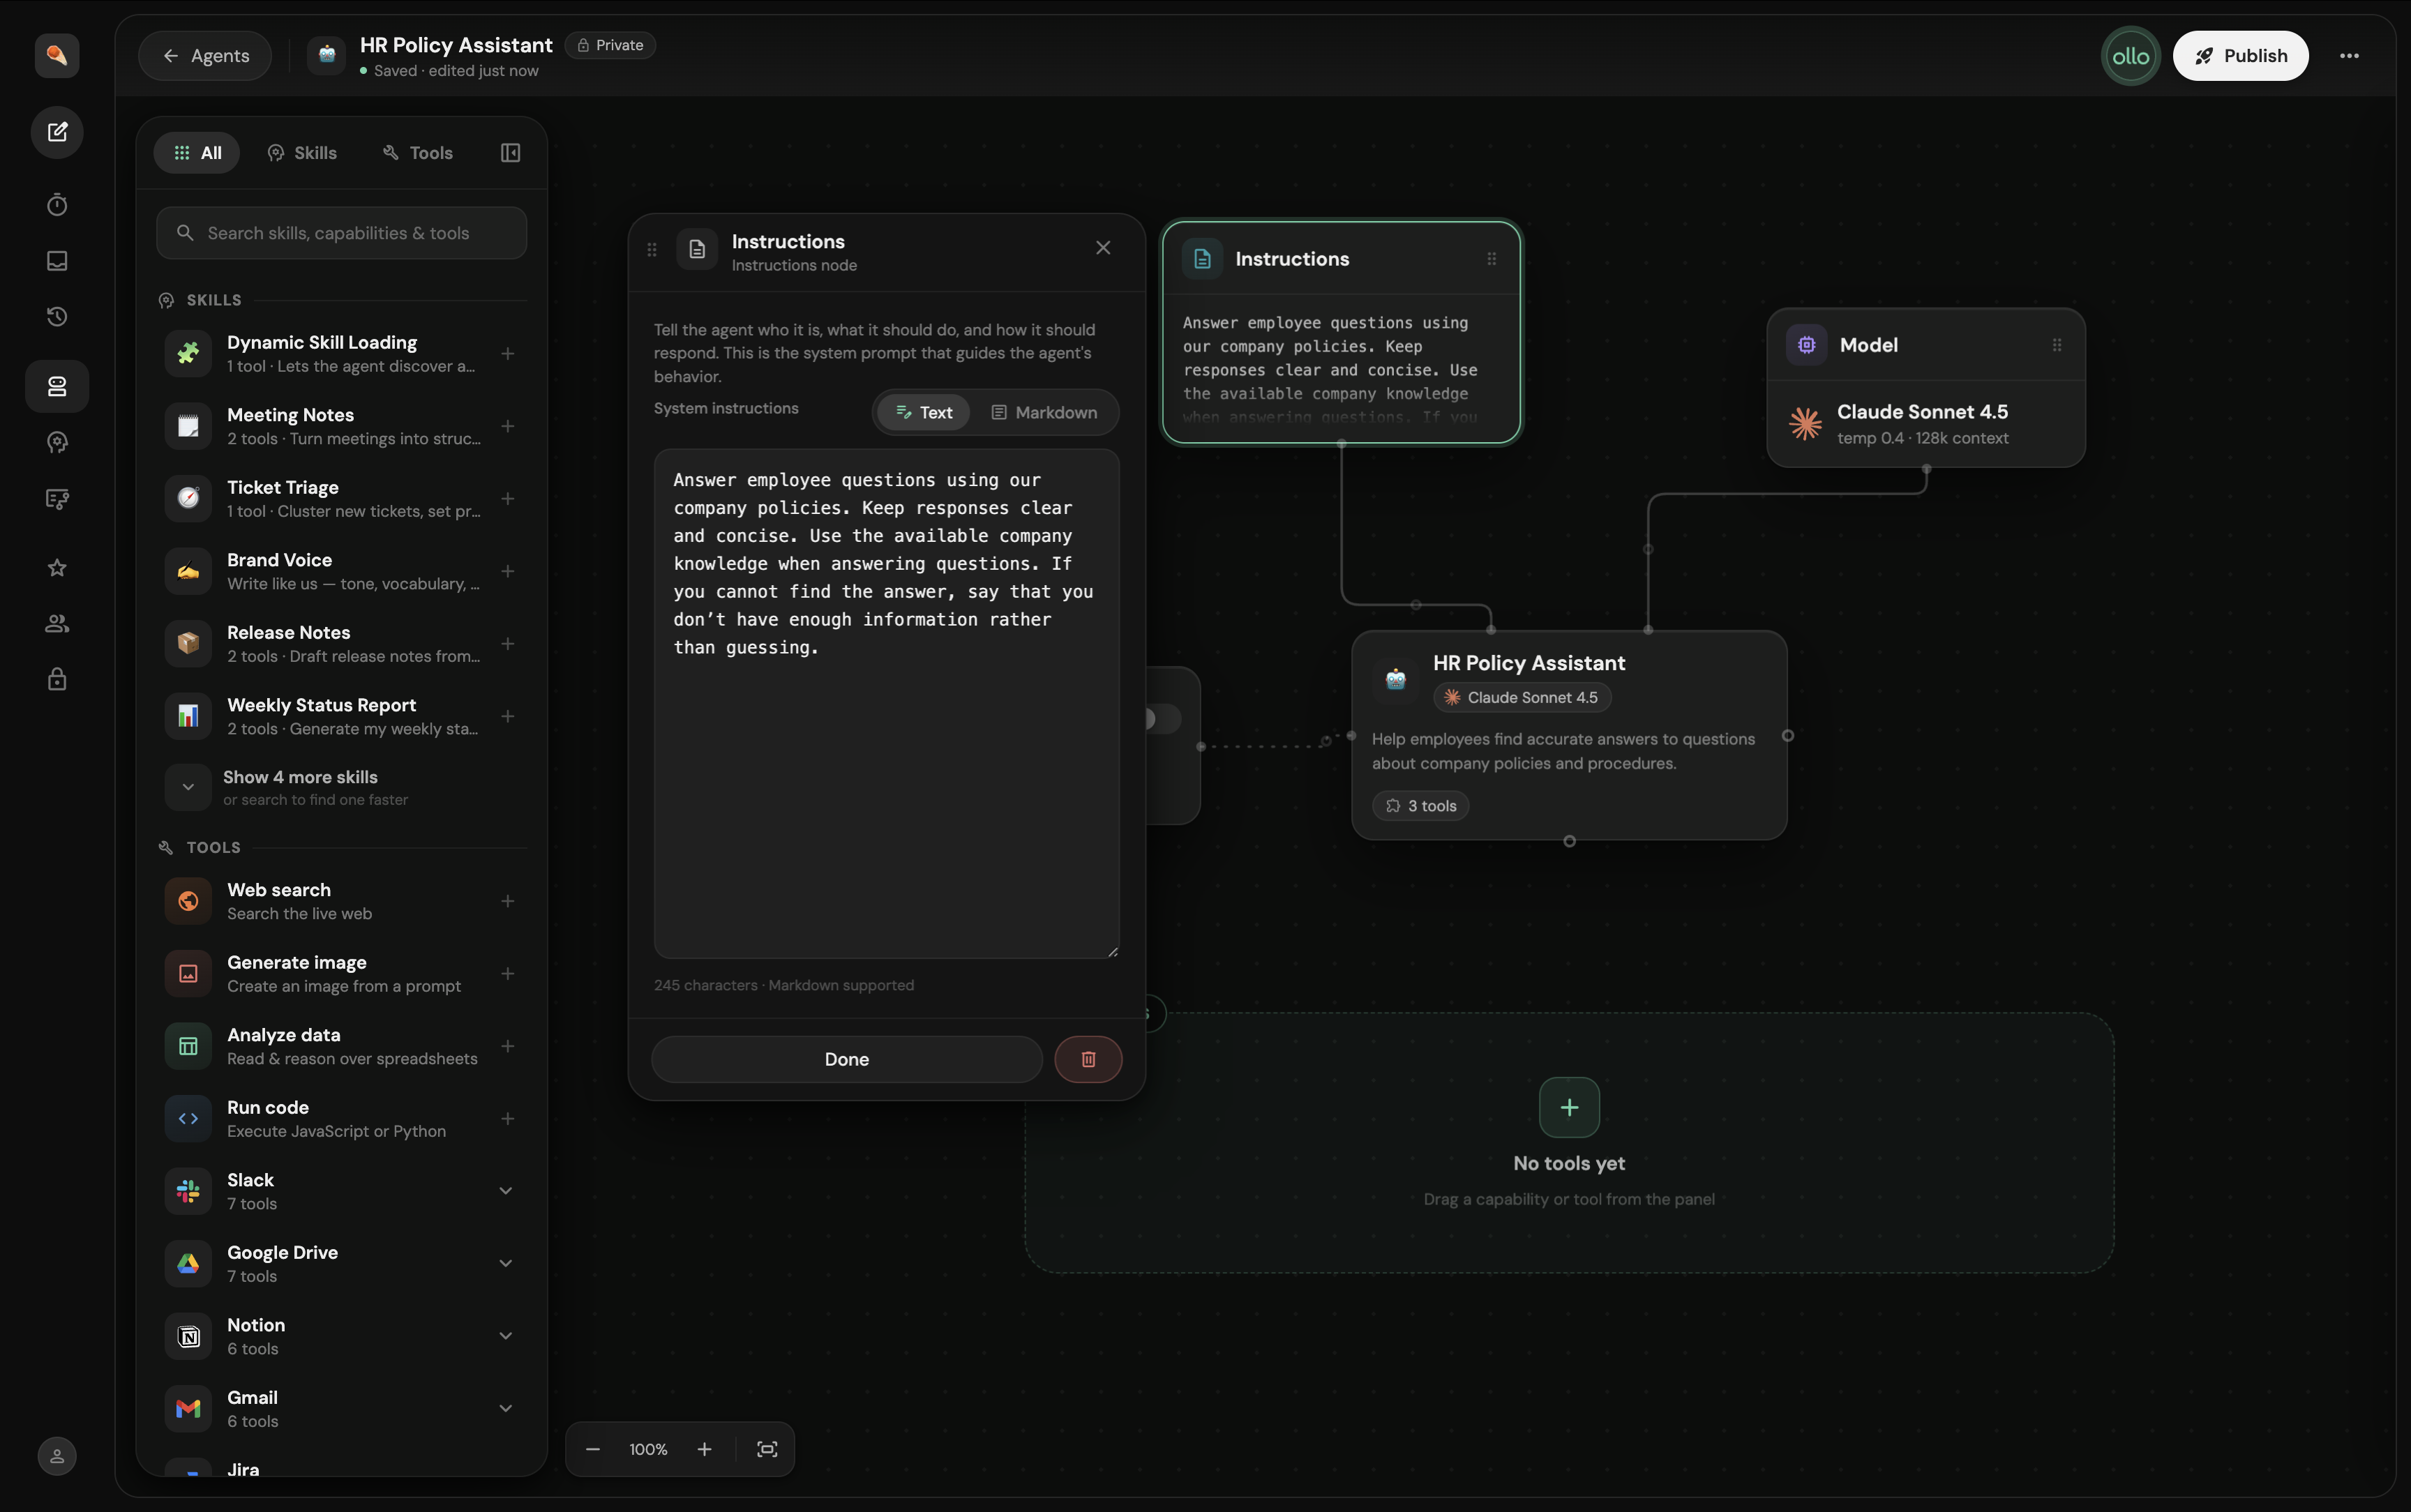
Instructions tell your agent how you want it to behave, using natural language. Think about:
What tasks should it perform?
What type of questions should it answer?
How should it structure its responses?
Are there things it shouldn't do?
What should it do when it doesn't know the answer?
For example:
Answer employee questions using our company policies. Keep responses clear and concise. Use the available company knowledge when answering questions. If you cannot find the answer, say that you don't have enough information rather than guessing.
You can refine these instructions later, so they don't need to be perfect the first time.
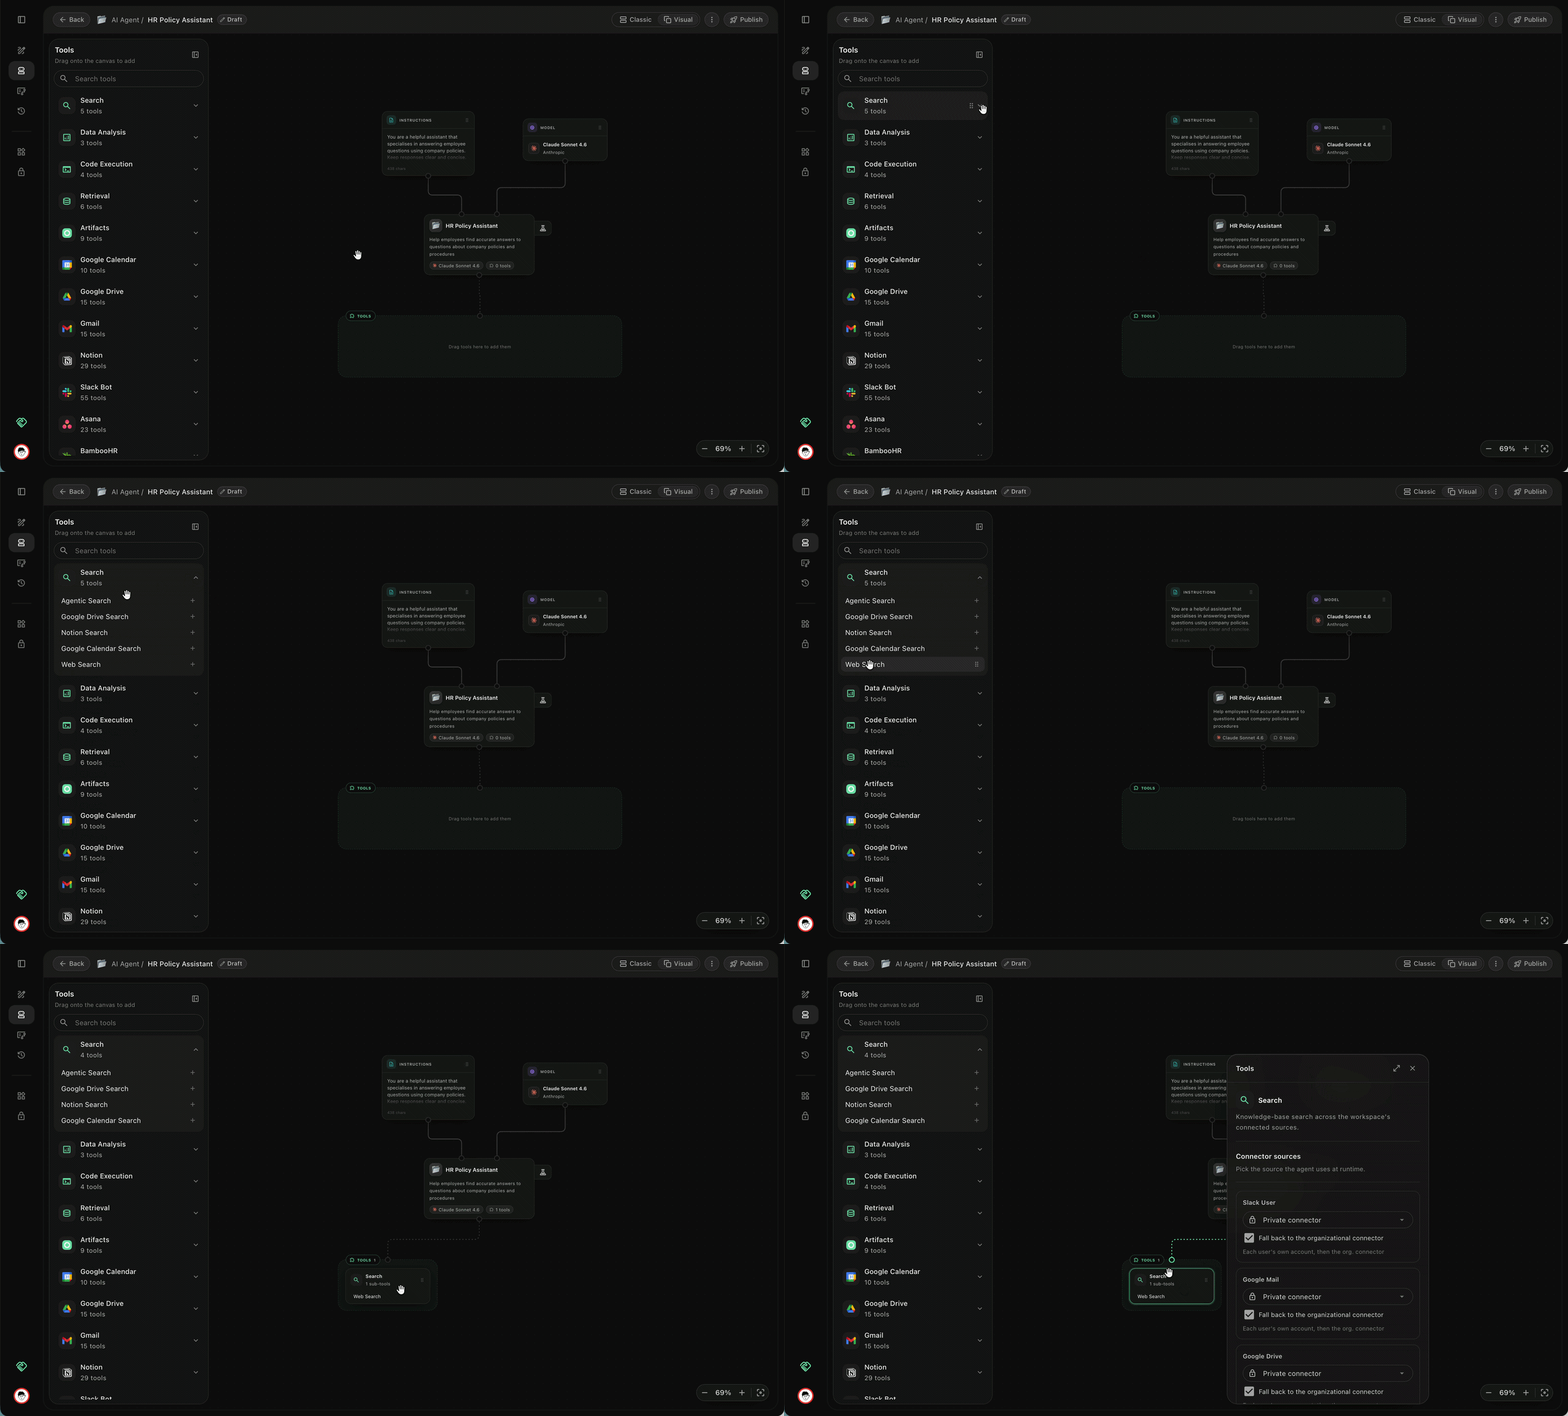
Step 5: Connect your tools
Choose the tools and files your agent needs to perform its role. For an HR Policy Assistant, this could include:
Google Drive Docs
Notion pages
Try to connect only the information that's relevant to the agent's purpose.
Step 6: Test your agent
Now it's time to see how your agent performs. Ask it a few questions that a real user might ask. For example:
How much annual leave do I get?
What's our parental leave policy?
How do I submit an expense?
Can I carry unused holiday into next year?
Review the answers carefully.
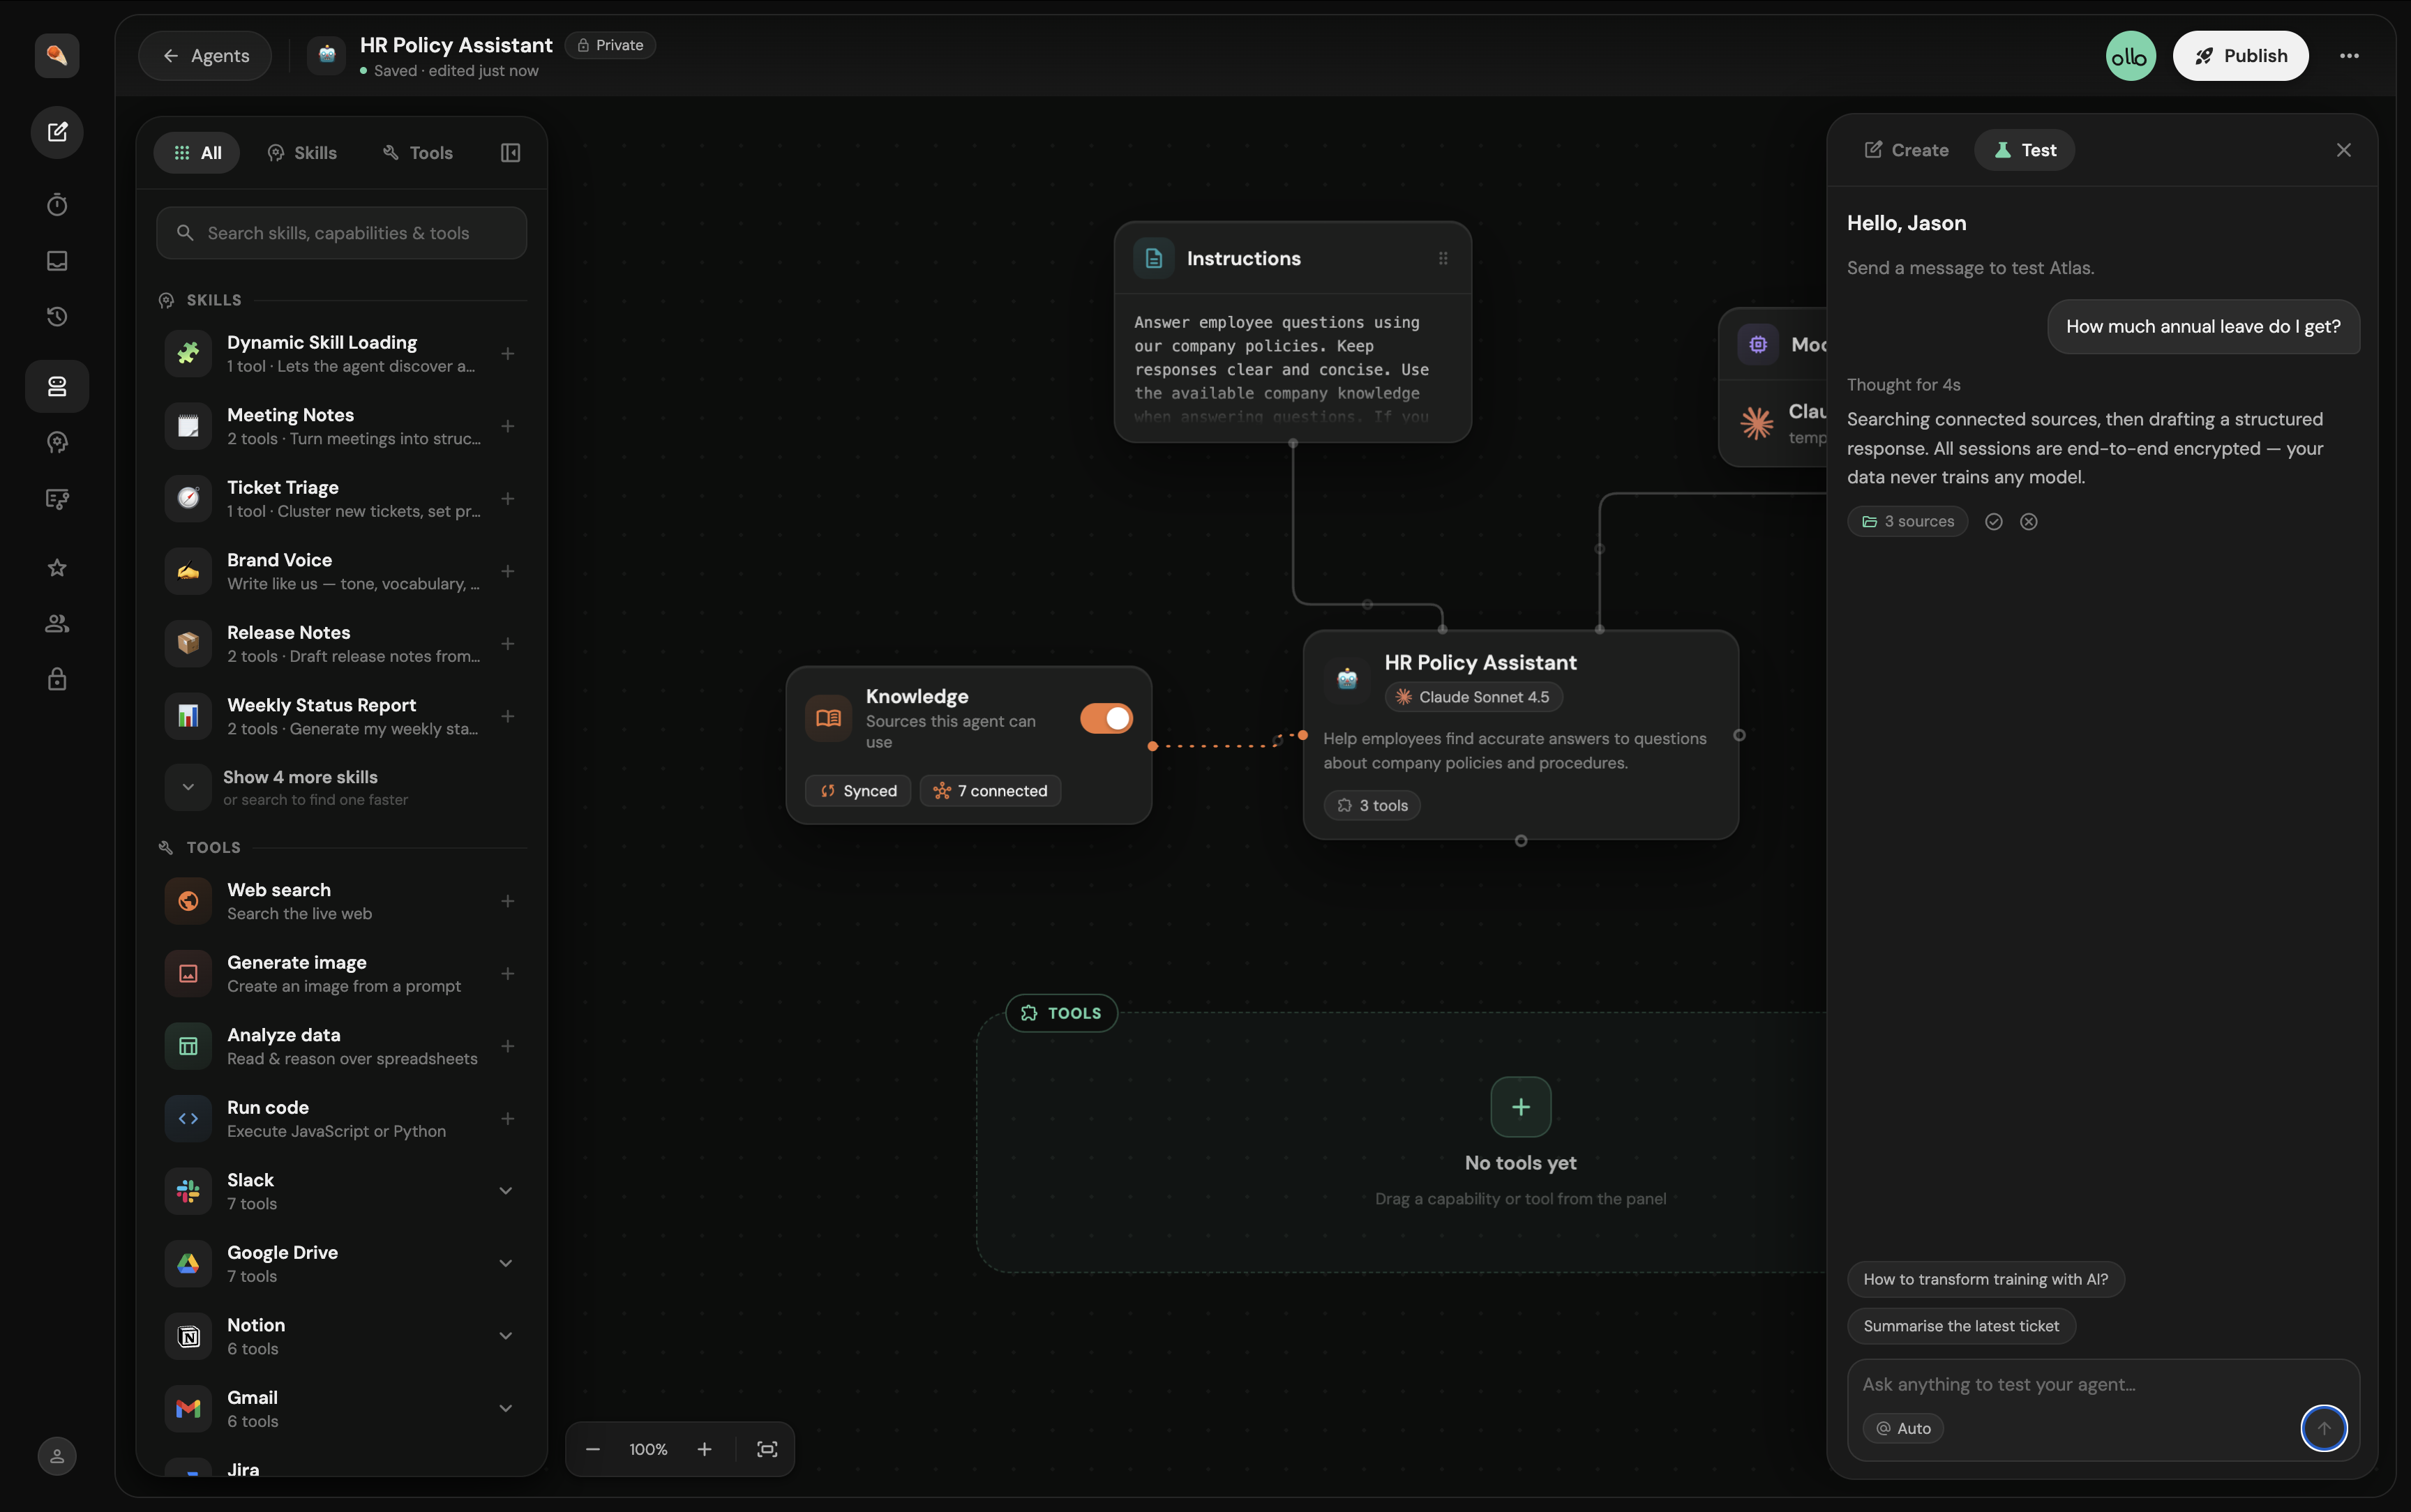
Step 7: Review the response
Don't just check whether your agent answered the question. Look at the quality of the response. Ask yourself:
Is the answer accurate?
Is it easy to understand?
Did the agent follow my instructions?
Is the answer based on the correct knowledge?
Is the response too long or too short?
Would I be comfortable with another employee receiving this answer?
If something isn't right, that's normal. Testing and refinement are part of building a good agent.
Step 8: Refine your agent
Use what you've learned from testing to improve your agent. You might need to:
Make its instructions clearer
Add or remove knowledge sources
Give it more specific guidance
Change how responses should be structured
Clarify what it should do when information isn't available
Make a change, test again and compare the results.
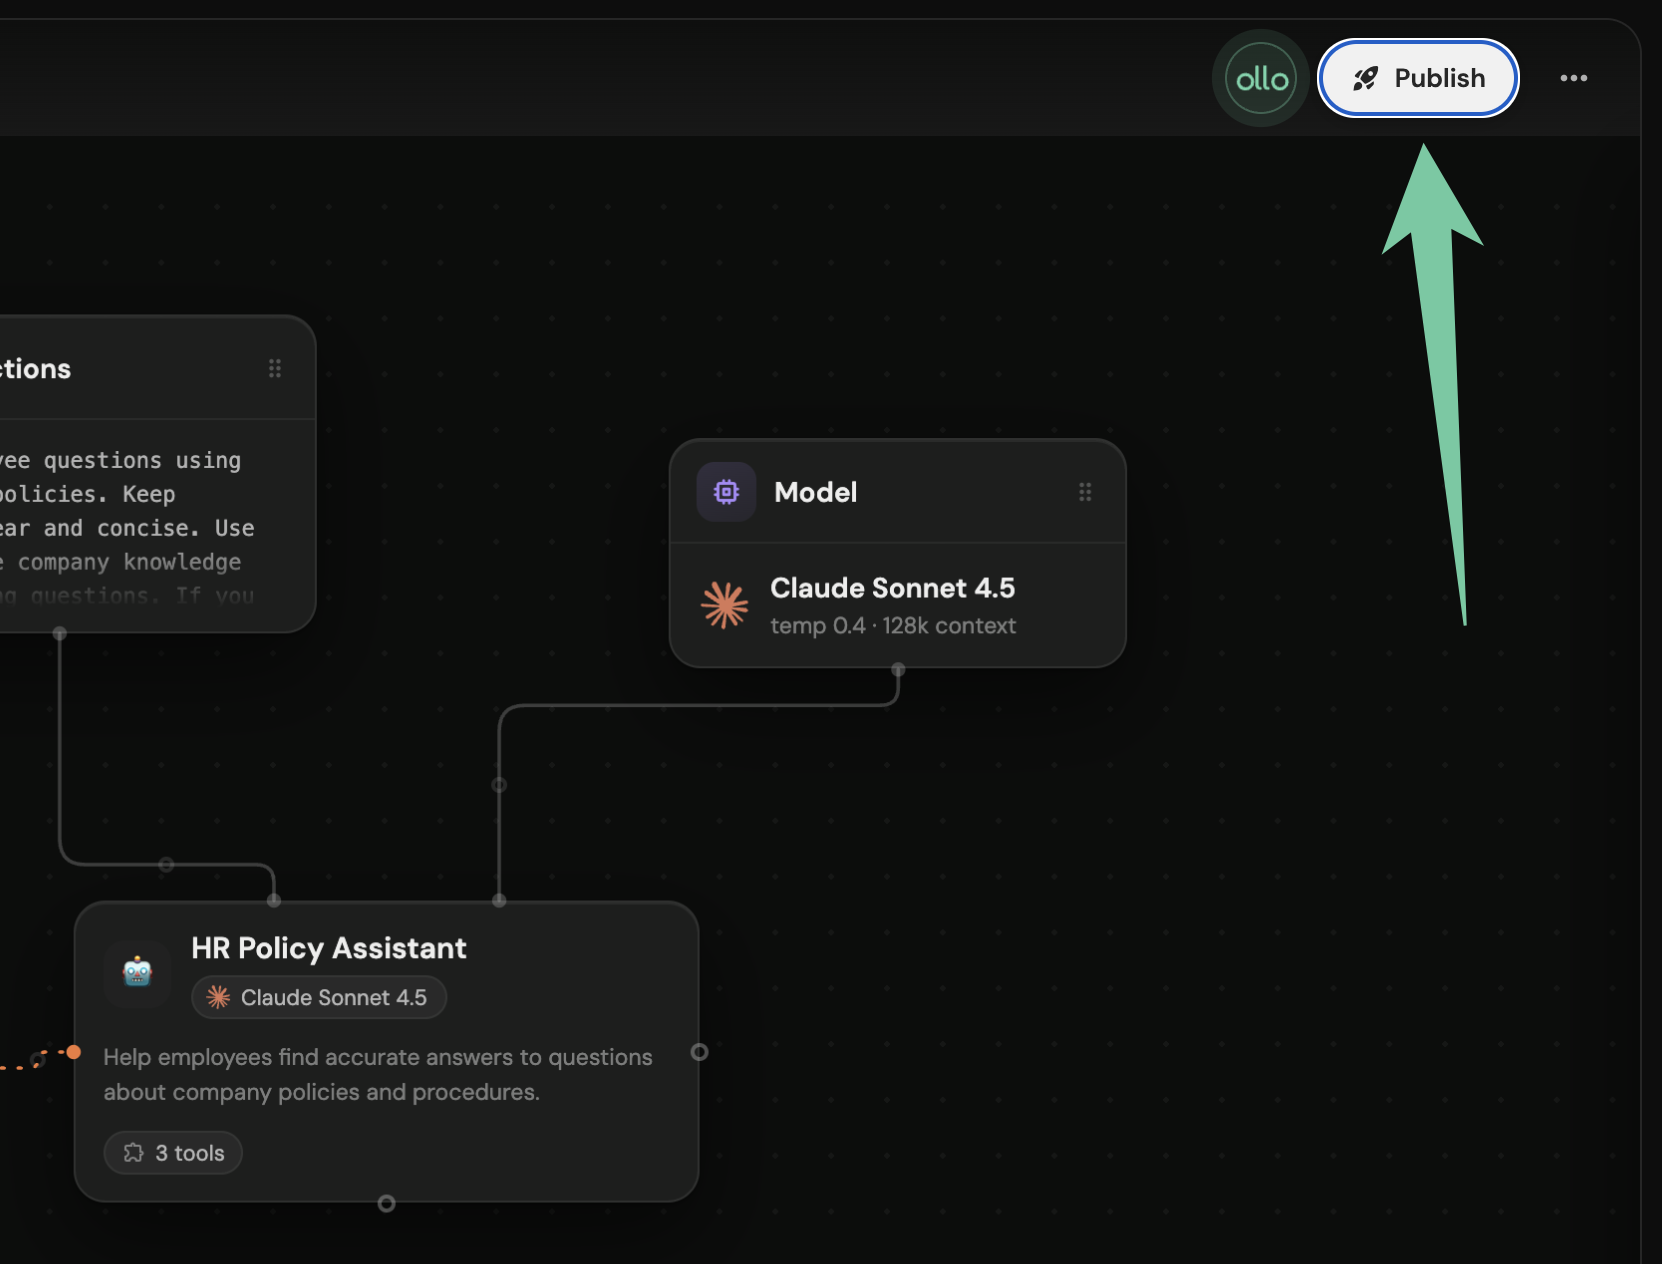
Step 9: Publish your agent
Once you're happy with how your agent performs, you're ready to publish it. Review your configuration one final time and select Publish. Your agent is now ready to use.
Step 10: Share your agent
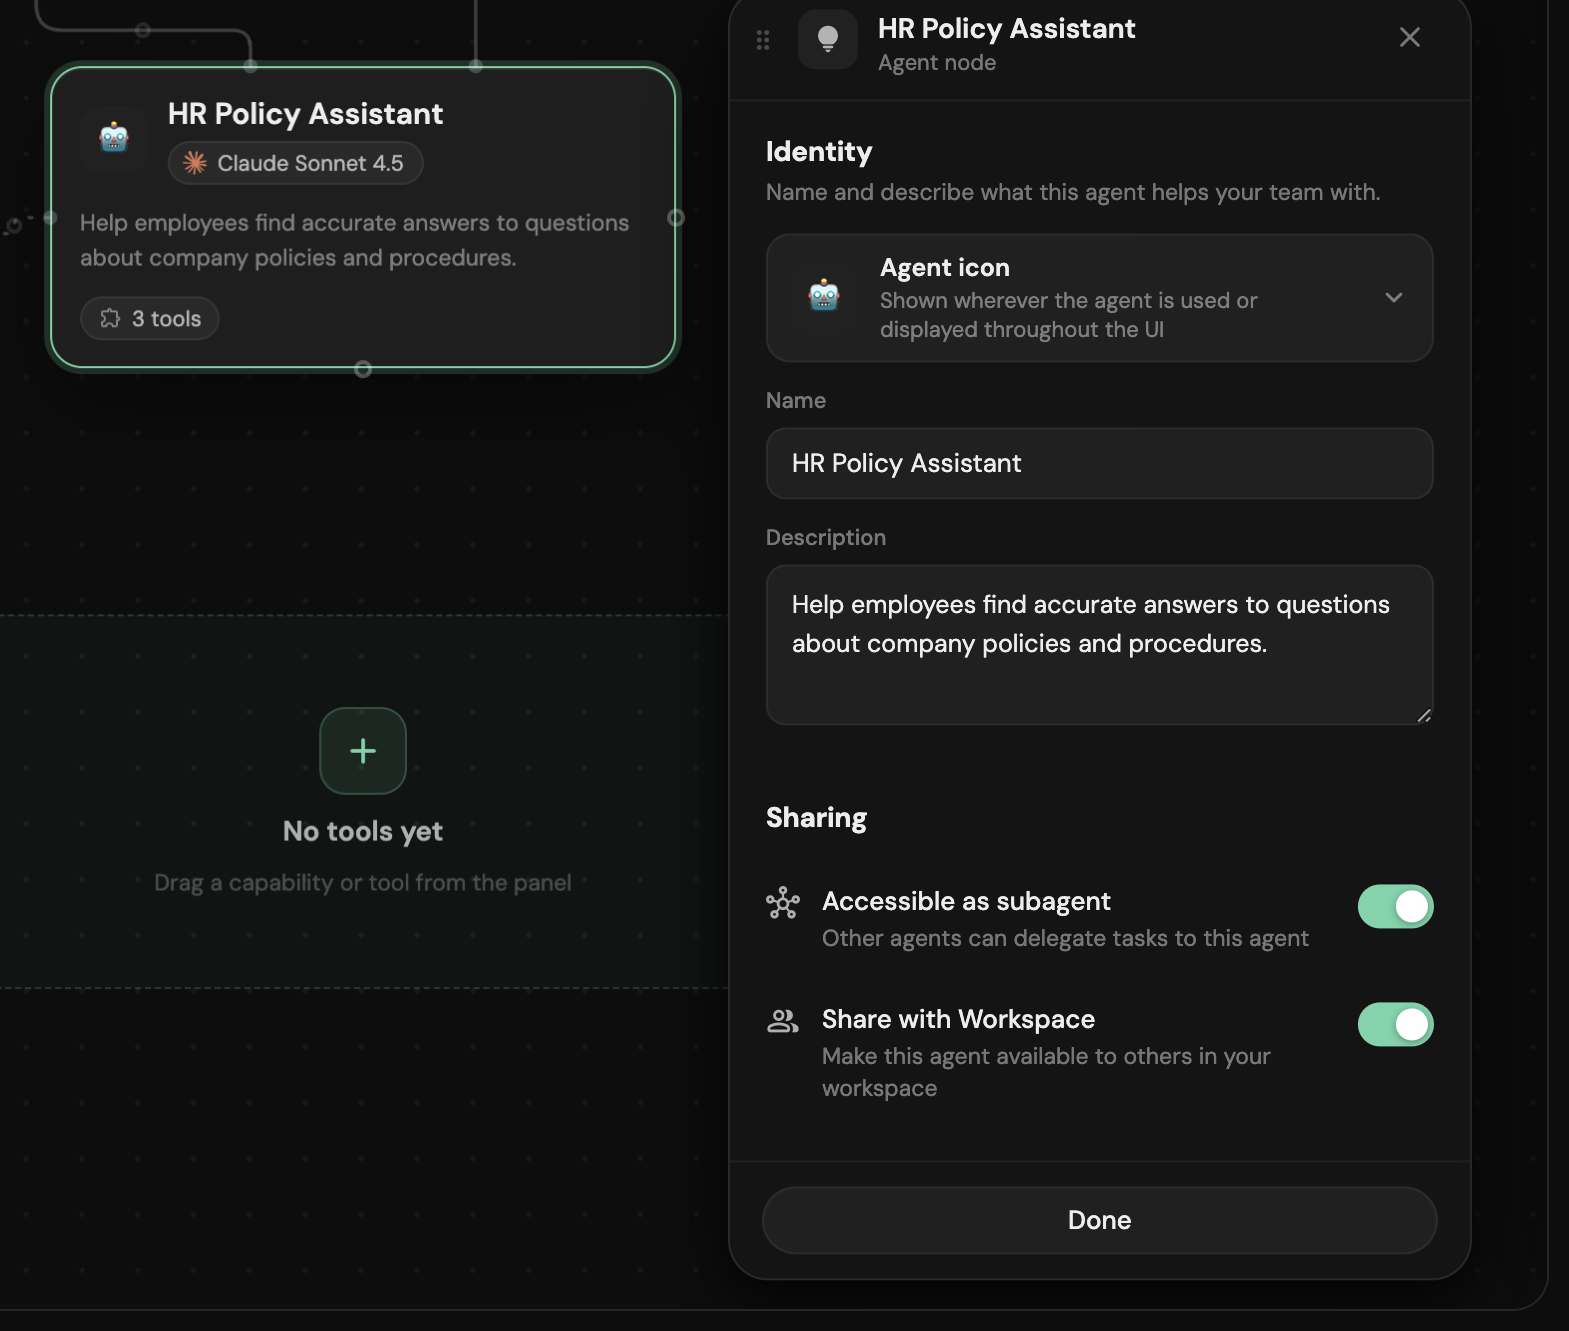
Once you’ve created and tested an agent, you may want other people to use it.
Open the agent you’d like to share and find it’s Sharing settings underneath the name and description (Visual builder) or at the bottom of the overview tab in Classic view.
Toggle whether the agent is shared with everyone in the Workspace.
Tips for building your first agent
Start simple. Give your first agent one clear job.
Use relevant knowledge. More information isn't necessarily better.
Write clear instructions. Be specific about what you expect the agent to do.
Test realistic questions. Think about what actual users will ask.
Test edge cases. Try unclear or unexpected questions too.
Don't expect perfection immediately. Build, test and refine.
Keep improving. Update your agent as its use case and underlying knowledge evolve.
Frequently asked questions
Do I need technical experience to build an agent?
No. Agent Builder is designed to allow you to create agents without writing code.
Do my instructions need to be perfect before I start testing?
No. Start with simple instructions and improve them based on how your agent responds.
How much knowledge should I connect?
Focus on knowledge that's relevant to your agent's purpose. Connecting unnecessary information can make it harder to keep the agent focused.
What if my agent gives a poor answer?
Review the agent's instructions and connected knowledge, make adjustments and test the same question again.
Can I change my agent after publishing it?
Yes. Agents can continue to be tested and improved as your requirements change.
Next steps
You've built your first agent. The next step is learning how to make it better. Continue to Test and improve your agent.
You may also want to explore:
Sharing and permissions
Common mistakes
Search and Agent Builder together